Manage your calendar and contacts in Outlook
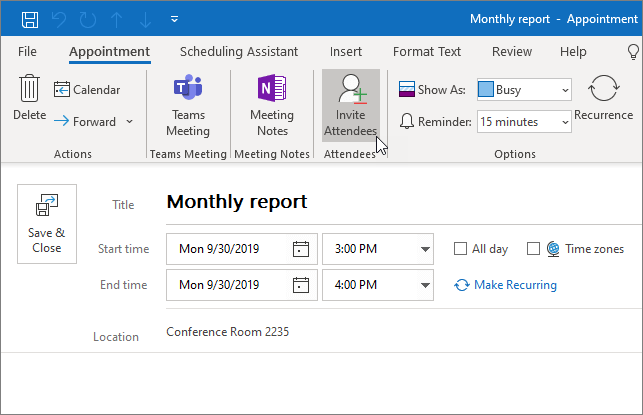
Schedule an appointment
-
In Calendar, select New Appointment.
-
Add a Subject, Location, and the start and end times.
-
Select Invite Attendees to turn the appointment into a meeting.
-
Select Save & Close to finish, or Send if it's a meeting.
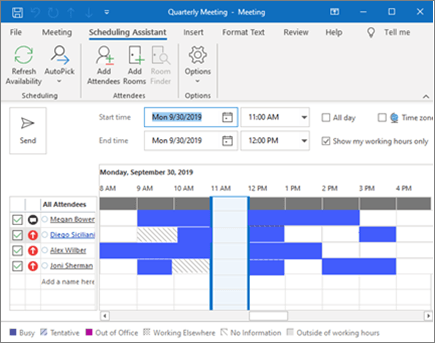
Use the Scheduling Assistant
When you create a meeting, use the Scheduling Assistant to see when attendees and rooms are available.
-
From a new meeting request, select Scheduling Assistant.
-
The shaded area with vertical bars shows the meeting time. Drag the bars to adjust the meeting time.
-
The grid shows when attendees are available. To the right of the meeting request, Outlook shows suggested times and the number of conflicts.
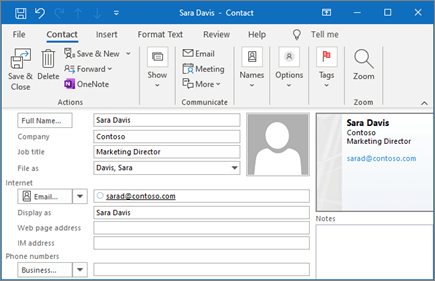
Add a contact
-
Select the People icon.
-
Select New Contact or press Ctrl+N.
-
Enter a name and any other information that you want to include for the contact.
-
Select Save & New to create another contact, or Save & Close if you're done.
Related Articles
Create and send email in Outlook
Create and send email Choose New Email to start a new message. Enter a name or email address in the To, Cc, or Bcc field. If you don't see Bcc, see Show, hide, and view the Bcc box. In Subject, type the subject of the email message. Place the cursor ...Manage files and folders in OneDrive
Select what to do with a file In OneDrive, right click the file. Select a command. Create a folder Select New > Folder. Type a name for the folder. Select Create. Set up the new OneDrive sync client in Windows If you don't have Windows 10, Office ...How to set up Rules
Use rules to organize your email. Create a rule based on a message, or from a template. Create a rule on a message Right-click a message and select Rules > Create Rule. Select a condition, and what to do with the message based on the condition. For ...Set-up an automatic reply
Select File > Automatic Replies. Select Send automatic replies. Select Only send during this time range. Choose the dates and times you'd like to set your automatic reply for. Type in a message. Select OK. Note: To set an automatic reply for contacts ...Create tasks and a to-do list
Create tasks and to-do list items in Outlook for Mac to help you stay organized. Select the Tasks icon, and then select New Task. Add a subject, date, and priority. Select the Reminder checkbox if you'd like to set a reminder. Select Save & Close.